
The Honeywell 6000 Series offers a smart‚ efficient‚ and user-friendly thermostat solution. Designed for optimal performance‚ it features programmable scheduling‚ wireless connectivity‚ and compatibility with various HVAC systems. This series enhances home comfort and energy savings‚ making it ideal for modern smart home integrations. Perfect for new installations or upgrades‚ the Honeywell 6000 Series promotes convenience and an eco-friendly lifestyle. This guide provides a comprehensive overview of installation‚ configuration‚ and maintenance to maximize your thermostat’s potential.
1.1 Overview of the Honeywell 6000 Thermostat
The Honeywell 6000 Series thermostat is a cutting-edge‚ programmable device designed for seamless integration with modern HVAC systems. It features a sleek‚ user-friendly interface with a high-resolution touchscreen display‚ allowing for intuitive temperature control. The thermostat supports Wi-Fi connectivity‚ enabling smart home integration and remote management through Honeywell’s Home app. With advanced scheduling options and energy-saving modes‚ it ensures efficient heating and cooling. Compatible with a wide range of systems‚ the Honeywell 6000 thermostat is ideal for homeowners seeking convenience‚ comfort‚ and energy efficiency.
1.2 Key Features and Benefits
The Honeywell 6000 thermostat boasts programmable scheduling‚ allowing users to customize temperature settings for energy efficiency. It features Wi-Fi connectivity‚ enabling remote control via Honeywell’s Home app. The thermostat supports smart home integration‚ compatibility with various HVAC systems‚ and energy-saving modes. Its high-resolution touchscreen display ensures easy navigation. With advanced features like geofencing and voice control through smart assistants‚ it enhances convenience. The Honeywell 6000 is designed to optimize comfort while reducing energy consumption‚ making it a versatile and cost-effective solution for modern homes.

Pre-Installation Requirements
Verify system compatibility and ensure necessary tools are available; Check wiring configurations and prepare materials for a smooth installation process. Review manual for specific requirements.
2.1 Compatibility Check
Before installation‚ ensure the Honeywell 6000 thermostat is compatible with your HVAC system. Verify voltage requirements‚ wiring configuration‚ and system type (heating‚ cooling‚ or heat pump). Check if your system supports programmable thermostats and Wi-Fi connectivity for smart features. Refer to the installation manual or manufacturer’s website for a list of compatible systems. Ensuring compatibility prevents installation issues and guarantees optimal performance. This step is crucial for a seamless setup and functionality.
2.2 Tools and Materials Needed
To install the Honeywell 6000 thermostat‚ gather essential tools and materials. You’ll need a screwdriver (flathead and Phillips)‚ wire strippers‚ a voltage tester‚ and a drill with bits for wall mounting. Ensure you have wall anchors‚ screws‚ and potentially a new wallplate if your old one is damaged. For battery-powered models‚ install fresh AA alkaline batteries. Refer to the installation manual for specific requirements. Having all materials ready ensures a smooth and efficient setup process. Proper preparation avoids delays and ensures compatibility with your system.

Installation Process
The Honeywell 6000 installation involves removing the old thermostat‚ installing the wallplate‚ connecting wiring‚ and mounting the new device. Follow the manual for precise steps and test functionality post-installation.
3.1 Removing the Old Thermostat
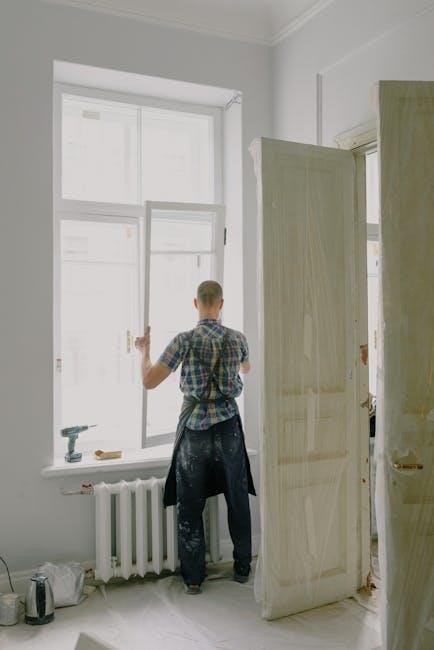
Start by turning off the power to your HVAC system at the circuit breaker. Gently pull the old thermostat away from the wall to access the wiring. Disconnect the wires carefully‚ noting their positions for later use. Remove any screws holding the thermostat in place and take it down. If your old thermostat uses batteries‚ remove them to prevent damage during replacement. Also‚ remove any additional wallplates or accessories. Ensure all components are safely disconnected before proceeding with the new installation. If unsure‚ consult a licensed professional.
3.2 Wallplate and Wiring Installation
Remove the wallplate from the new Honeywell 6000 thermostat and separate it from the main unit. Follow the mounting instructions for a clean installation. Handle the wiring carefully to avoid damage. Ensure wires are properly labeled and connected according to the thermostat’s wiring diagram. Secure the wallplate firmly to the wall using the provided screws. Align the thermostat with the wallplate and gently snap it into place. Make sure all connections are tight and properly seated to ensure reliable operation. If unsure‚ consult a licensed electrician or HVAC professional.
3.3 Mounting the Honeywell 6000 Thermostat
Align the Honeywell 6000 thermostat with the wallplate‚ ensuring it fits securely. Gently press the unit onto the wallplate until it clicks into place. Check that the thermostat is level and firmly attached. If the wallplate was moved‚ ensure the screws are tightly fastened. For battery-powered models‚ install fresh AA alkaline batteries before mounting. Make sure the thermostat is snug and even‚ avoiding any tilt or unevenness. Tighten all connections to ensure a stable and proper installation. This ensures optimal performance and prevents potential issues.

Configuration and Setup
Configure the Honeywell 6000 thermostat by selecting your HVAC system type‚ preferred temperature settings‚ and scheduling options. Enable Wi-Fi for smart home integration and remote control. Follow on-screen prompts to complete the setup process‚ ensuring all features are properly activated for optimal performance. Refer to the detailed instructions in the subsequent sections for precise guidance.
4.1 Initial System Configuration
Begin by powering on the Honeywell 6000 thermostat and selecting your preferred language. Choose your HVAC system type (e.g.‚ heat pump‚ gas furnace) to ensure compatibility. Set your temperature units (Fahrenheit or Celsius) and configure the date and time settings. Enable or disable features like auto-changeover or emergency heat based on your system. Follow the on-screen prompts to complete the initial setup‚ ensuring all system components are recognized and functioning properly. This step ensures a smooth transition to advanced configurations like scheduling and Wi-Fi connectivity.
4.2 Setting Up Heating and Cooling Options
Configure your Honeywell 6000 thermostat by selecting the appropriate heating and cooling options. Choose your system type (e.g.‚ heat pump‚ gas furnace‚ or electric) from the menu. Set temperature ranges for both heating and cooling modes. Enable features like emergency heat if applicable. Adjust the fan settings to optimize airflow and comfort. Ensure the thermostat is set to the correct operating mode (Heat‚ Cool‚ or Auto). These settings ensure your HVAC system operates efficiently and maintains your desired indoor climate. Proper configuration enhances performance and energy savings.
4.3 Enabling Wi-Fi and Smart Features
To enable Wi-Fi and smart features on your Honeywell 6000 thermostat‚ navigate to the settings menu. Select “Wi-Fi Setup” and choose your network from the available list. Enter your password to connect. Once connected‚ link your thermostat to the Honeywell Home app for remote control. Enable voice assistant integration for hands-free commands. Smart features like geofencing and energy usage reports optimize performance. Ensure your router is compatible and your internet connection is stable for uninterrupted functionality. These features enhance convenience and energy efficiency‚ making your system smarter and more accessible.

System Testing
Test heating‚ cooling‚ and fan functions to ensure proper operation. Verify emergency heat and system responses. Confirm all settings work correctly for smooth performance.
5.1 Testing Heating and Cooling Functions
After installation‚ test the heating and cooling functions to ensure proper operation. Set the thermostat to “Heat” and verify the system activates. Check for warm air flow. Switch to “Cool” and confirm cooling operation. Test the fan setting to ensure continuous airflow. Verify emergency heat functionality if applicable. Ensure smooth transitions between modes. Refer to the installation manual for specific test procedures. Proper testing confirms system compatibility and ensures reliable performance. Address any issues promptly to avoid operational problems later.
5.2 Verifying Fan and Emergency Heat Settings
After confirming heating and cooling functions‚ verify the fan and emergency heat settings. Set the fan to “Auto” and “On” to ensure proper airflow. Check if the fan operates continuously in “On” mode. For emergency heat‚ ensure it is enabled in the thermostat settings. Test the emergency heat function by selecting it and verifying the system response. Confirm the furnace door is securely closed and batteries are correctly installed if applicable. Proper verification ensures all system components function as intended‚ providing reliable performance and comfort. Address any issues promptly to maintain efficiency.

Troubleshooting Common Issues
Common issues include wiring or connection problems‚ display errors‚ or communication failures. Check connections‚ restart the system‚ and ensure proper setup. Consult the manual or contact Honeywell support for assistance if issues persist.
6.1 Resolving Wiring or Connection Problems
Start by ensuring all wires are securely connected to both the thermostat and HVAC system. Check for loose connections‚ as they can prevent the thermostat from functioning properly. Verify that the wiring matches the system requirements specified in the installation manual. If using a battery-powered thermostat‚ ensure batteries are fresh and correctly installed. Reset the thermostat after any wiring changes. Consult the manual for specific error codes and their meanings. If issues persist‚ contact a professional or Honeywell support for assistance. Always turn off power to the system before making repairs to avoid safety hazards.
6;2 Addressing Display or Communication Errors
If the display is blank or unresponsive‚ ensure the thermostat has power. Check for loose wires or incorrect connections. Restart the system by turning off power at the circuit breaker‚ then turning it back on. For communication errors‚ verify Wi-Fi settings and ensure the thermostat is connected to the correct network. Clear any error codes by performing a factory reset‚ following the manual’s instructions. If issues persist‚ update the thermostat’s firmware or contact Honeywell support for further assistance; Always refer to the user manual for specific troubleshooting steps.

Maintenance and Upkeep
Regularly clean the thermostat display and ensure proper wiring connections. Check for firmware updates to maintain optimal performance. Replace batteries as needed to prevent system interruptions.
7.1 Cleaning the Thermostat
Cleaning the Honeywell 6000 thermostat is essential for maintaining its performance and accuracy. Power off the device before cleaning to avoid damage. Use a soft‚ dry cloth to gently wipe the display and exterior surfaces. Avoid harsh chemicals or liquids‚ as they may damage the screen or internal components. For dust buildup‚ lightly brush the vents or crevices with a small‚ dry brush. Regular cleaning ensures proper temperature sensing and prevents malfunction. Always refer to the manual for specific cleaning instructions tailored to your model.
7.2 Updating Firmware or Software
Regular firmware or software updates ensure optimal performance and security for your Honeywell 6000 thermostat. Check the current version via the thermostat’s menu or the Honeywell Home app. Visit Honeywell’s official website to download the latest updates. Follow the installation instructions provided in the manual or online guide. Updating typically involves downloading the file‚ transferring it to the thermostat‚ and restarting the system. This process enhances functionality‚ fixes bugs‚ and adds new features. Always refer to the official documentation for detailed steps to avoid errors during the update process.

Advanced Features and Customization
The Honeywell 6000 Series offers advanced features like programmable scheduling‚ smart home integration‚ and energy-saving modes. Customize settings through the Honeywell Home app or thermostat interface for enhanced functionality and personalized comfort.
8.1 Scheduling and Programmable Settings
The Honeywell 6000 Series allows users to create customizable schedules tailored to their lifestyle. Program daily temperature adjustments to optimize comfort and energy efficiency. Set specific times for heating‚ cooling‚ or fan operation to maintain ideal conditions. Use the Honeywell Home app or the thermostat’s interface to configure these settings. Energy-saving modes can be activated during peak hours or when the home is unoccupied. Customizable schedules ensure consistent comfort while reducing energy consumption. Easily adjust programs to adapt to seasonal changes or personal preferences for enhanced flexibility and control.
8.2 Integrating with Smart Home Systems
The Honeywell 6000 Series seamlessly integrates with popular smart home systems‚ enhancing convenience and control. Compatible with Amazon Alexa and Google Home‚ users can adjust settings via voice commands. The Honeywell Home app allows remote access to customize schedules‚ monitor energy usage‚ and receive alerts. Integration with smart hubs enables synchronized operation with other smart devices. This feature-rich compatibility simplifies daily routines and optimizes energy efficiency without compromising comfort. Setup is straightforward‚ ensuring a smooth transition to a connected smart home experience.

Installation complete! For further support‚ visit Honeywell’s official website or refer to the provided manuals for troubleshooting and advanced features. Happy automation!
9.1 Final Checklist for Installation
- Ensure all wiring connections are secure and match the system requirements.
- Verify the thermostat is properly mounted on the wallplate.
- Test heating‚ cooling‚ and fan functions to confirm proper operation.
- Check that the thermostat display is responsive and functioning correctly.
- Confirm Wi-Fi connectivity and smart features are enabled.
- Review programmed settings to ensure they align with your preferences.
- Ensure the system is powered on and functioning as expected.
- Dispose of packaging materials responsibly.
- Store the installation manual for future reference.
Your Honeywell 6000 thermostat is now fully installed and ready for use!
9.2 Contacting Honeywell Support
For any questions or issues during or after installation‚ contact Honeywell Support for assistance. Visit their official website at www.honeywell.com for contact details‚ support resources‚ and troubleshooting guides. You can also reach them via phone‚ email‚ or live chat. Ensure you have your product model number (e.g.‚ TH6000) and installation details ready for faster resolution. Additionally‚ refer to the provided installation manual for specific support contact information tailored to your region. Honeywell’s dedicated team is available to address your concerns promptly and effectively.