
PowerWise 36 Volt Charger Manual: A Comprehensive Guide
This manual details the PowerWise 36V, 15A charger, covering installation of the P/N 9012 control board, safety, operation, and troubleshooting—with a 6-36 month warranty․
The PowerWise 36 Volt charger is a robust and reliable power solution designed specifically for electric vehicle batteries requiring a 36V system․ This comprehensive guide provides essential information for safe and effective operation, installation, and maintenance․ It details the charger’s specifications, including its 15A current output, dimensions of 6․25 x 6․87 x 10․25 inches, and a substantial 30lbs weight․
A 9-foot cord ensures convenient reach during charging․ This manual also covers the crucial P/N 9012 control board, a replacement for both P/N 28566-G01 and P/N 28566-G03, offering a streamlined upgrade path․ Understanding this guide will maximize the charger’s performance and longevity, backed by a warranty ranging from six to thirty-six months․
Understanding the Charger Specifications
The PowerWise 36V charger delivers a consistent 36-volt output with a maximum current of 15 amps, ensuring efficient battery charging․ Its physical dimensions are 6․25 inches in length, 6․87 inches in width, and 10․25 inches in height, with a total weight of 30 pounds․ These specifications are crucial for proper placement and installation․

The charger features a 9-foot power cord, providing ample reach for various charging locations․ The core of the system relies on the control board, P/N 9012, which supersedes the older P/N 28566-G01 and P/N 28566-G03 versions․ Understanding these details is vital for optimal performance and compatibility․
Voltage and Current Output (36V, 15A)
The PowerWise 36V charger is specifically engineered to deliver a stable 36-volt direct current (DC) output․ This voltage is critical for effectively charging 36-volt battery systems commonly found in electric vehicles and related applications․ The charger’s maximum current output is 15 amps, representing the highest rate at which it can supply power to the battery․
This 15A current capacity allows for relatively fast charging times, though actual charging speed depends on the battery’s current state of charge and capacity․ Maintaining the correct voltage and current is essential for battery health and longevity, preventing overcharging or damage․
Charger Dimensions and Weight (6․25 x 6․87 x 10․25 in, 30lbs)
Understanding the physical characteristics of the PowerWise 36V charger is important for installation and placement․ The charger’s dimensions are 6․25 inches in width, 6․87 inches in depth, and 10․25 inches in height․ These measurements ensure compatibility with various mounting locations and spaces․
Furthermore, the charger has a substantial weight of 30 pounds․ This robust build quality contributes to its durability and stability during operation․ When planning installation, it’s crucial to consider both the dimensions and weight to ensure a secure and appropriate setup, preventing potential hazards or damage․
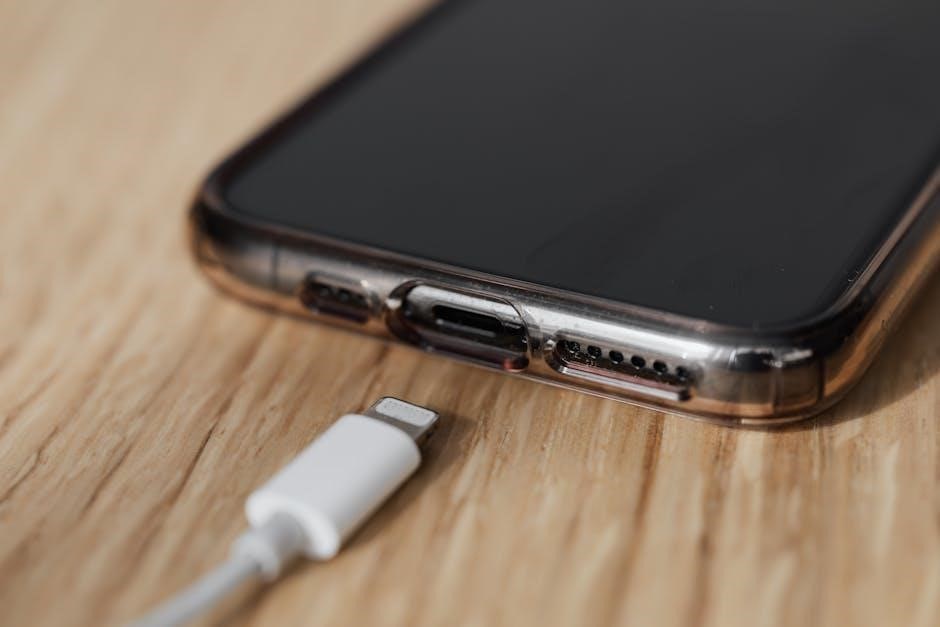
Cord Length (9 feet)

The PowerWise 36V charger is equipped with a 9-foot power cord, providing substantial reach and flexibility during operation․ This generous cord length allows for convenient connection to a power source, even when outlets are not immediately adjacent to the charging location․
This extended reach minimizes the need for extension cords, reducing potential voltage drops and ensuring a stable charging process․ When positioning the charger, ensure the 9-foot cord is adequately routed to prevent tripping hazards or strain on the connection․ Proper cord management contributes to safe and efficient charging․
Safety Precautions
Prioritize safety when operating the PowerWise 36V charger․ Always inspect the cord for damage before each use, and never operate with a frayed or damaged cord․ Avoid exposure to water or excessive moisture, as this presents an electrical hazard․ Ensure adequate ventilation during charging to prevent overheating․
Do not attempt to disassemble or modify the charger; this voids the warranty and could create a safety risk․ Disconnect the charger from the power source before cleaning․ This charger is designed for charging specified batteries only; improper use may cause damage or injury․ Follow all local electrical codes․
General Safety Guidelines
Always read and understand this manual before using the PowerWise 36V charger․ Operate the charger in a well-ventilated area, free from flammable materials․ Never leave the charger unattended during operation․ Keep children and unauthorized personnel away from the charging area․ Inspect the battery terminals for corrosion before connecting the charger․
Use appropriate personal protective equipment, such as safety glasses, when working with batteries․ Do not charge damaged or leaking batteries․ Disconnect the charger from both the battery and the power outlet before performing any maintenance․ Ensure the charger is placed on a stable, level surface during operation․
Avoiding Electrical Hazards
To prevent electrical shock, always disconnect the PowerWise 36V charger from the power outlet before inspecting or cleaning it․ Never operate the charger with a damaged cord or plug․ Avoid exposing the charger to water or other liquids․ Do not attempt to repair the charger yourself; contact a qualified technician for assistance․
Ensure the power outlet is properly grounded․ Do not use extension cords unless absolutely necessary, and then only use heavy-duty cords rated for the charger’s amperage․ Be cautious when working near batteries, as they can release explosive gases․ Avoid creating sparks or open flames in the vicinity of the charger․
Charger Components and Identification
The PowerWise 36V charger utilizes a central control board, P/N 9012, which consolidates the functionality of the previously used P/N 28566-G01 and P/N 28566-G03 circuit boards․ This streamlined design simplifies maintenance and improves reliability․ Key components include the input power connector, output connectors for battery attachment, and indicator lights displaying charging status․
Proper identification of these components is crucial for troubleshooting and replacement․ The P/N 9012 board houses the charging circuitry and control logic․ Familiarize yourself with the location of each component for safe and effective operation of the PowerWise charger․
Control Board (P/N 9012) ⏤ Replacement Information
The P/N 9012 control board is a direct replacement for both the original P/N 28566-G01 and P/N 28566-G03 charger circuit boards used in the PowerWise battery charger system․ This consolidation simplifies inventory and reduces potential compatibility issues․ When replacing a faulty board, ensure the charger is disconnected from both the AC power source and the battery․
Carefully follow the installation instructions detailed in the subsequent section to avoid damaging the new control board or other charger components․ Proper installation guarantees optimal performance and extends the charger’s lifespan․
Original Circuit Boards Replaced (P/N 28566-G01 & P/N 28566-G03)
Previously, PowerWise battery chargers utilized two distinct circuit boards: P/N 28566-G01 and P/N 28566-G03․ These boards managed the charging process and provided essential safety features․ However, to streamline maintenance and improve reliability, these have been superseded by the single, unified P/N 9012 control board․
Owners with chargers containing either of the original part numbers can easily upgrade by installing the P/N 9012․ This replacement eliminates the need to stock multiple board types and simplifies troubleshooting procedures, offering a more efficient solution for charger repairs․

Installation Guide for Control Board (P/N 9012)
Replacing the original circuit boards with the P/N 9012 control board is a straightforward process․ Begin by disconnecting the charger from the power source and any connected batteries․ Carefully remove the existing boards, noting the position of all wiring connections․
Install the new P/N 9012 board, ensuring all wires are reconnected to their corresponding terminals․ Double-check all connections for security before restoring power․ Following these steps will ensure proper functionality and maintain the charger’s performance․ Refer to diagrams for visual guidance if needed․
Step-by-Step Installation Instructions
Step 1: Disconnect the PowerWise charger from both the AC power source and the battery․ Step 2: Carefully remove the existing charger circuit boards (P/N 28566-G01 or P/N 28566-G03)․ Document wire placement before removal․
Step 3: Install the new P/N 9012 control board, aligning it correctly within the charger housing․ Step 4: Reconnect all wires to their original terminals on the new board, ensuring secure connections․ Step 5: Verify all connections before reconnecting the charger to power and the battery․
Operating Instructions
To begin, connect the PowerWise 36V charger to a properly grounded AC power outlet․ Next, securely connect the charger’s DC output cable to the battery’s charging port, ensuring correct polarity; Initiate the charging cycle; the charger will automatically detect the battery’s state and adjust accordingly․
During operation, monitor the charging process for any unusual indicators․ A full charge is indicated by the charger’s status light․ Disconnect the charger from both the battery and the power source once charging is complete․ Always refer to safety precautions before and during operation․
Connecting the Charger to the Battery
Before connecting, ensure the PowerWise 36V charger is switched off and unplugged from the AC power source․ Locate the battery’s charging port and verify it’s clean and free of obstructions․ Carefully align the charger’s DC output connector with the battery port, paying close attention to polarity – positive to positive, negative to negative․
Securely insert the connector until it clicks or is firmly seated․ Do not force the connection․ A loose connection can cause charging issues or damage․ Double-check the connection before proceeding to initiate the charging cycle․ Improper connection can lead to safety hazards․

Initiating the Charging Cycle
Once the charger is securely connected to the battery, plug the PowerWise 36V charger into a grounded AC power outlet․ The charger will automatically begin its diagnostic check and, if compatible, initiate the charging cycle․ Observe the charger for any indicator lights or display readings confirming operation․
The charging process typically involves multiple stages, including bulk, absorption, and float․ Allow the charger to complete these stages uninterrupted for optimal battery health․ Do not disconnect the charger during operation unless absolutely necessary․ Monitor the charging process as described in the following section․
Monitoring the Charging Process
During the charging cycle, regularly check the charger’s indicator lights․ These lights provide visual cues about the charging stage – bulk, absorption, or float – and overall status․ A solid green light typically indicates a fully charged battery, while a flashing light may signal charging in progress or an error condition․
If the charger features a display, monitor the voltage and current readings to track the battery’s charging progress․ Ensure these values remain within the specified limits (36V, 15A)․ Any unusual readings or error messages should prompt immediate investigation and potential troubleshooting․
Troubleshooting Common Issues
If the PowerWise 36V charger fails to power on, first verify the AC power source and ensure the power cord is securely connected․ Check the fuse within the charger for any breaks․ If the battery isn’t charging, confirm the connections between the charger and battery terminals are clean and tight․
Inspect the control board (P/N 9012) for any visible damage․ A faulty control board may require replacement․ If issues persist, consult the warranty information for potential repair or replacement options․ Always prioritize safety and disconnect the charger before inspecting internal components․
Charger Not Powering On
If the PowerWise 36V charger doesn’t activate, begin by verifying the AC power supply․ Ensure the power cord is firmly plugged into both the charger and a functioning outlet․ Inspect the fuse located within the charger housing; a blown fuse will prevent operation and requires replacement with the correct amperage rating․
Check for any visible damage to the power cord itself․ A damaged cord poses an electrical hazard and should be replaced immediately․ Confirm the on/off switch, if equipped, is in the ‘on’ position․ If these steps don’t resolve the issue, the control board (P/N 9012) may be faulty․
Battery Not Charging
If the PowerWise 36V charger connects but the battery isn’t receiving a charge, first confirm a secure connection between the charger’s DC output and the battery terminals․ Inspect the battery terminals for corrosion or debris, cleaning them if necessary to ensure good contact․ Verify the battery’s voltage; a severely discharged battery may not initiate charging immediately․
The charger’s control board (P/N 9012) could be malfunctioning, preventing proper voltage delivery․ Also, check the battery itself for internal faults; a damaged or aged battery may be unable to accept a charge․ A faulty battery management system (BMS) within the battery pack can also inhibit charging․
Warranty Information
The PowerWise 36V charger is covered by a warranty ranging from six months to 36 months, depending on the specific purchase date and applicable terms․ This warranty protects against defects in materials and workmanship under normal use․ Damage resulting from misuse, improper installation, or unauthorized modifications is not covered․
Warranty coverage includes repair or replacement of the defective charger or components, such as the control board (P/N 9012), at the manufacturer’s discretion․ To initiate a warranty claim, provide proof of purchase and a detailed description of the issue․ Contact customer support for return authorization and further instructions․
Warranty Duration (6-36 months)
The PowerWise 36V charger’s warranty period varies, extending from a minimum of six months to a maximum of 36 months from the original date of purchase․ The specific duration is determined by factors such as the point of sale, promotional offers at the time of purchase, and any extended warranty plans acquired separately․
Customers should retain their purchase receipt as proof of the warranty start date․ Warranty coverage begins on the date of the original retail purchase, not the date of installation or first use․ This duration ensures a reasonable period for identifying and addressing potential manufacturing defects․
Warranty Coverage Details
This PowerWise 36V charger warranty covers defects in materials and workmanship under normal use․ It does not cover damage resulting from misuse, abuse, accidents, unauthorized modifications, improper maintenance, or acts of nature․ Specifically, damage caused by overvoltage, incorrect battery connections, or physical impact is excluded․
The warranty’s scope includes repair or replacement of defective parts, at the manufacturer’s discretion․ Labor costs for warranty repairs are also covered․ To initiate a warranty claim, contact the original point of purchase or the manufacturer directly, providing proof of purchase and a detailed description of the issue․
Basic Calculator Functions (Related to Power Calculations)
Understanding fundamental calculations is crucial when working with the PowerWise 36V charger and battery systems․ This section outlines essential functions․ Addition (+) and subtraction (-) are used for calculating net power changes․ Multiplication (*) determines total energy consumption over time, while division (/) finds power per unit time․
The square root function (√) can be helpful in certain impedance calculations․ Percentage (%) is useful for determining charging efficiency or power loss․ Online calculators simplify these tasks, offering features like clear buttons and memory functions for storing intermediate results, aiding in complex power-related computations․
Addition, Subtraction, Multiplication, and Division
These basic arithmetic operations are foundational for any power calculation related to the PowerWise 36V charger․ Addition (+) helps determine total power draw from multiple sources․ Subtraction (-) calculates remaining battery capacity after usage․ Multiplication (*) is essential for computing total energy (Watt-hours) when voltage and current are known․
Division (/) allows you to find current (Amps) given power (Watts) and voltage, or vice versa․ Online calculators provide quick execution of these functions, featuring clear and memory buttons for streamlined calculations․ Accurate application of these operations ensures correct assessment of charging and discharging processes․
Square Root and Percentage Calculations
Square root calculations, accessible through online tools, can be useful when dealing with areas related to charger component dimensions (6․25 x 6․87 inches)․ Percentage calculations are vital for determining charging efficiency – what percentage of full capacity is achieved during a cycle․ They also help assess battery health and remaining charge levels․
Understanding percentage loss during charging or discharging is crucial for optimal battery management․ Online calculators simplify these computations, offering features like memory recall and clear functions․ Accurate percentage assessments contribute to maximizing the lifespan and performance of your PowerWise 36V battery system․
Scientific Calculator Applications (Advanced Calculations)
For advanced PowerWise 36V charger analysis, scientific calculators offer tools beyond basic arithmetic․ Trigonometry and logarithms become relevant when analyzing AC power input waveforms or calculating impedance within the charging circuit․ Unit conversions are essential for working with voltage (36V), current (15A), and power measurements, switching between watts, kilowatts, and amp-hours․
Complex calculations involving energy storage capacity, charging rates, and discharge curves benefit from these functions․ Online scientific calculators provide features like equation solvers and complex number support, aiding in detailed system modeling and troubleshooting․ These tools enhance understanding of the charger’s operational characteristics․
Trigonometry and Logarithms
While seemingly unrelated to a battery charger, trigonometry and logarithms find application in analyzing alternating current (AC) power input to the PowerWise 36V unit․ AC waveforms are inherently trigonometric, allowing calculations of phase angles and power factor․ Logarithms are useful for scaling large or small values encountered in power measurements, such as decibel calculations for signal strength analysis within the control board (P/N 9012)․
These functions aid in understanding harmonic distortion and optimizing charging efficiency․ Though not directly used in daily operation, they are valuable for advanced diagnostics and circuit design related to the charger’s internal components․
Unit Conversions
The PowerWise 36V charger operates primarily with voltage (Volts) and current (Amps), but understanding related units is crucial; Conversions between Amps and milliAmps are frequently needed when analyzing circuit board (P/N 9012) performance․ Similarly, converting inches to millimeters may be necessary when replacing components or referencing dimensional specifications (6․25 x 6․87 x 10․25 in)․
Weight conversions (pounds to kilograms) are useful for shipping or handling the 30lbs charger․ Accurate unit conversions ensure correct calculations and prevent errors during maintenance or repair procedures, maintaining optimal charging efficiency․